Chellon Wizard
Assembly Guide
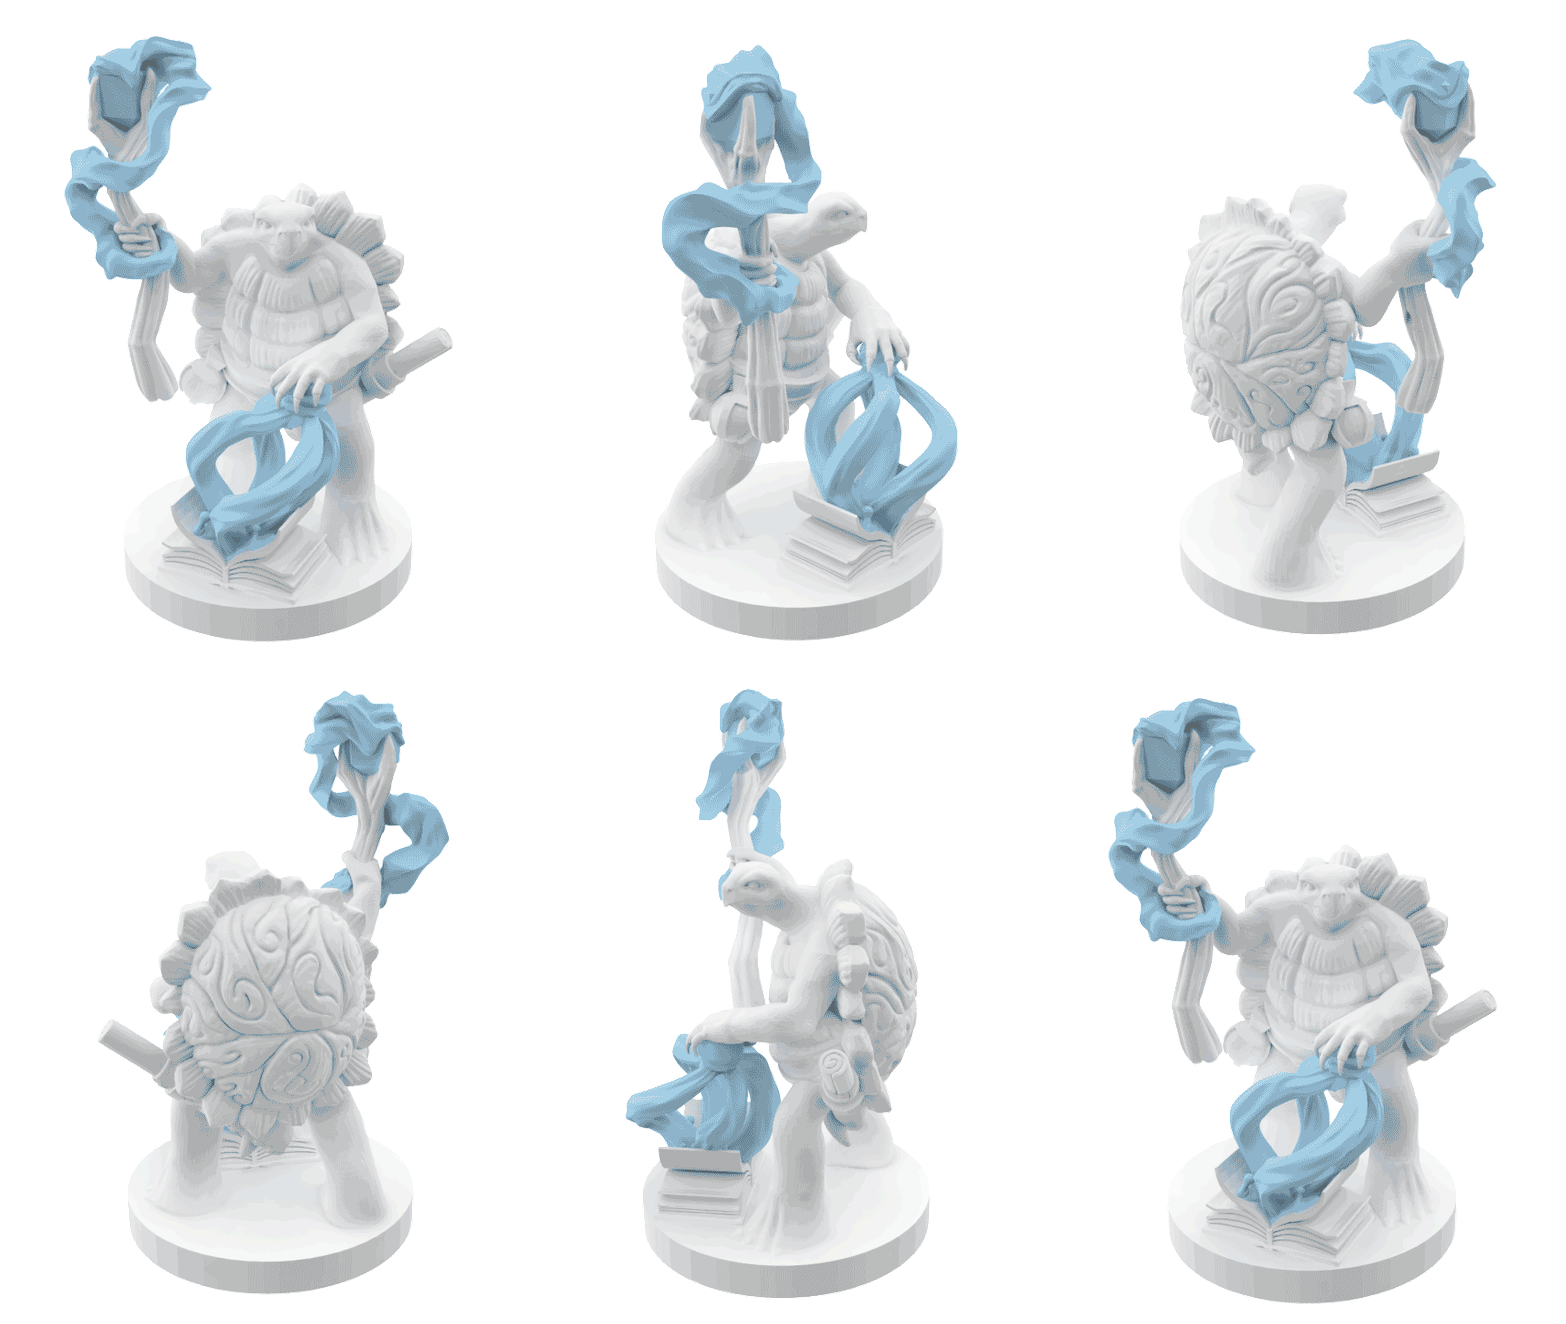
The Chellon Wizard has two spell effects: Spellbook and Staff. Refer to this rotating image for the intended placement.
Spellbook Spell Effect
-
Before Assembly: Reshaping & Painting
The Chellon Wizard’s clear spell pieces may require reshaping, so be sure to do that first to make assembling easier. See instructions here.
If you wish to paint the elements separately before assembling, you should do so before applying any adhesive!
-
Assembly: Step 1
Place the spiral-looking clear spell effect into the slot in the open spellbook by the wizard’s feet. The slot and bottom of the clear element will match up. Do not place the top of the spiral spell effect under the hand just yet.
You can add a small amount of adhesive in the bottom slot and let it dry to make the following steps a bit easier.

-
Assembly: Step 2
Next, notice the top of spell effect has a small peg. This peg will be slotted into the slot in the bottom of the wizard’s hand. Add a small amount of adhesive to the top peg of the spell effect – be mindful of the adhesive when moving the piece.
Gently move the top of the spell effect around the outside of the wizard’s hand and insert the peg into the slot in the wizard’s hand. It may take some adjusting.
Once the peg is slotted in the underside of the hand, wipe any excess adhesive away and let it dry.

-
Assembly: Step 3
The last step for the spellbook spell effect piece requires slotting the back part of the spiral effect into the underside of the spiral effect to create the closed spiral.
Put a small amount of adhesive on the top peg of the remaining element of the spiral and gently maneuver it to fit the peg snuggly into the bottom of the top of the spiral effect.

Staff Spell Effect
-
Before Assembly: Reshaping & Painting
The Chellon Wizard’s clear spell pieces may require reshaping, so be sure to do that first to make assembling easier. See instructions here.
If you wish to paint the elements separately before assembling, you should do so before applying any adhesive!
-
Assembly: Step 1
There are 3 separate points that can be glued to the wizard miniature: the gem at the top, the peg that slots into the knuckles, and the bottom that sits on the palm. It’s a good idea to do a few test placements prior to adding adhesive.

-
Assembly: Step 2
Put adhesive on the insides of the three points at the top of the staff. Then, carefully slide in the gem. Wipe away any access adhesive.

-
Assembly: Step 3
Next, add a small amount of adhesive to the peg on the spell effect near the knuckles. Place the peg into the knuckle slot and wipe any extra adhesive away.

-
Assembly: Step 4
Lastly, place a small amount of adhesive on the palm of the wizard’s hand with a toothpick or something similar. Hold this last part into place while it dries to avoid any sliding or slipping as it hardens. Be careful of contacting any excess adhesive with your skin.
See the rotating image for the intended placement of the spell effects.

